How To Replace Your Main Battery
All modern alarm systems rely on a backup battery to operate in the event of a power outage. Although the battery lasts for years receiving a constant charge in standby-mode, eventually it will need to be replaced. Most alarm systems alert you when the time has come to replace the battery and many people choose to have a service technician replace it while performing a full system check. But replacing your main backup battery is a quick and simple process that can be done without a service call, saving you time and money. The following steps can be taken to replace it to help ensure your system continues to operate at its full potential.
Warning: Alarm system lead-acid batteries contain toxic chemicals that can cause skin irritation and other dangers when mishandled. Extreme care should be taken when handling lead-acid batteries, including wearing gloves and safety glasses.
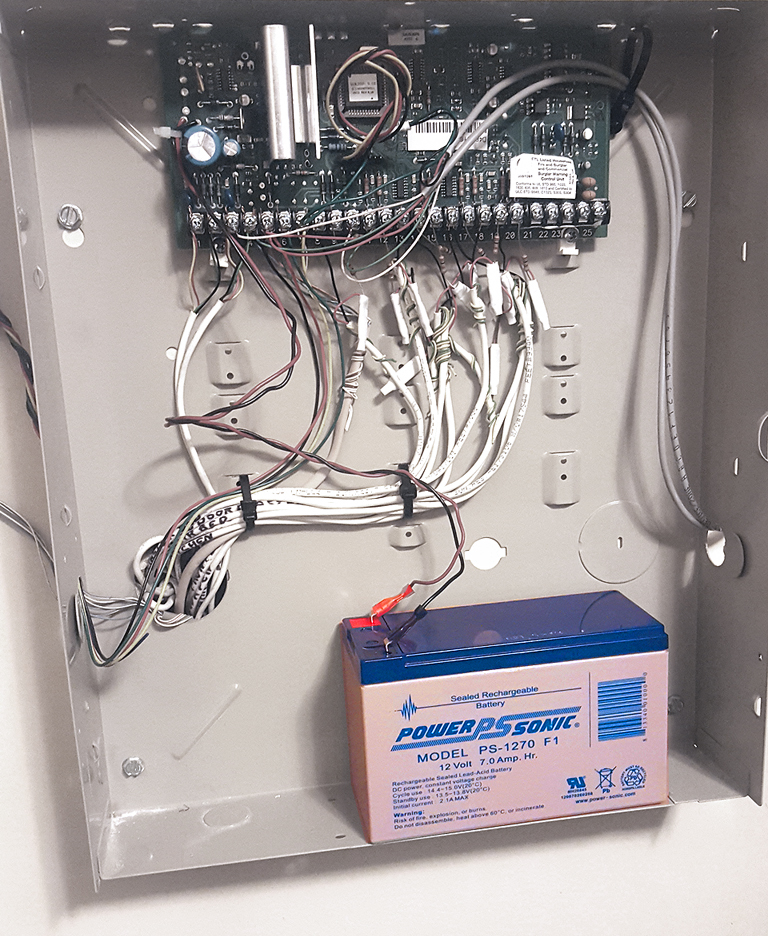
Location of the main battery
The main backup battery is located inside the main alarm control box, usually sitting at the bottom of the cabinet. If more than one battery is used by your alarm system, we recommend replacing them both.

Step 1: Carefully remove the old battery
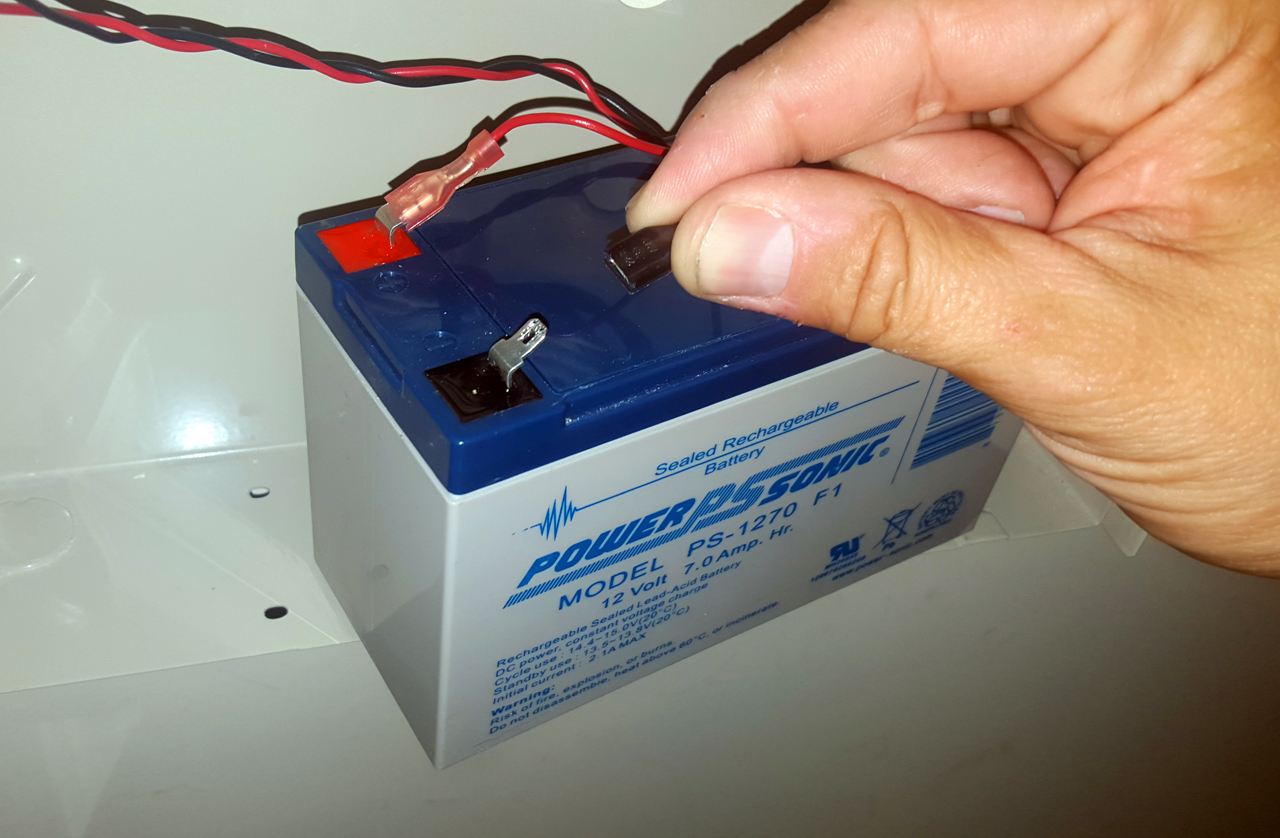
The battery is connected to the alarm system by two wires, colored red and black. The connections are simple slide-on plugs. Simply grasp each connector one at a time with your thumb and index finger and pull it away from the battery.
Do not attempt to disconnect the battery by pulling on the battery lead wires themselves because doing so can damage them.

The battery is now detached from your alarm system. Please do not discard the old battery by simply throwing it into the garbage because batteries contain toxic chemicals harmful to the environment. Instead, place the battery in a box or plastic bag and take it to your nearest recycler. You may also bring it to our office for a low priced exchange for a brand-new battery. We have partnered with a local environmentally-responsible recycler to handle all of our battery waste.
Local Battery RecyclersWarning: The lead-acid battery is very heavy and dropping it can cause personal injury. Use extreme care when handling it.
Step 2: Install the new battery
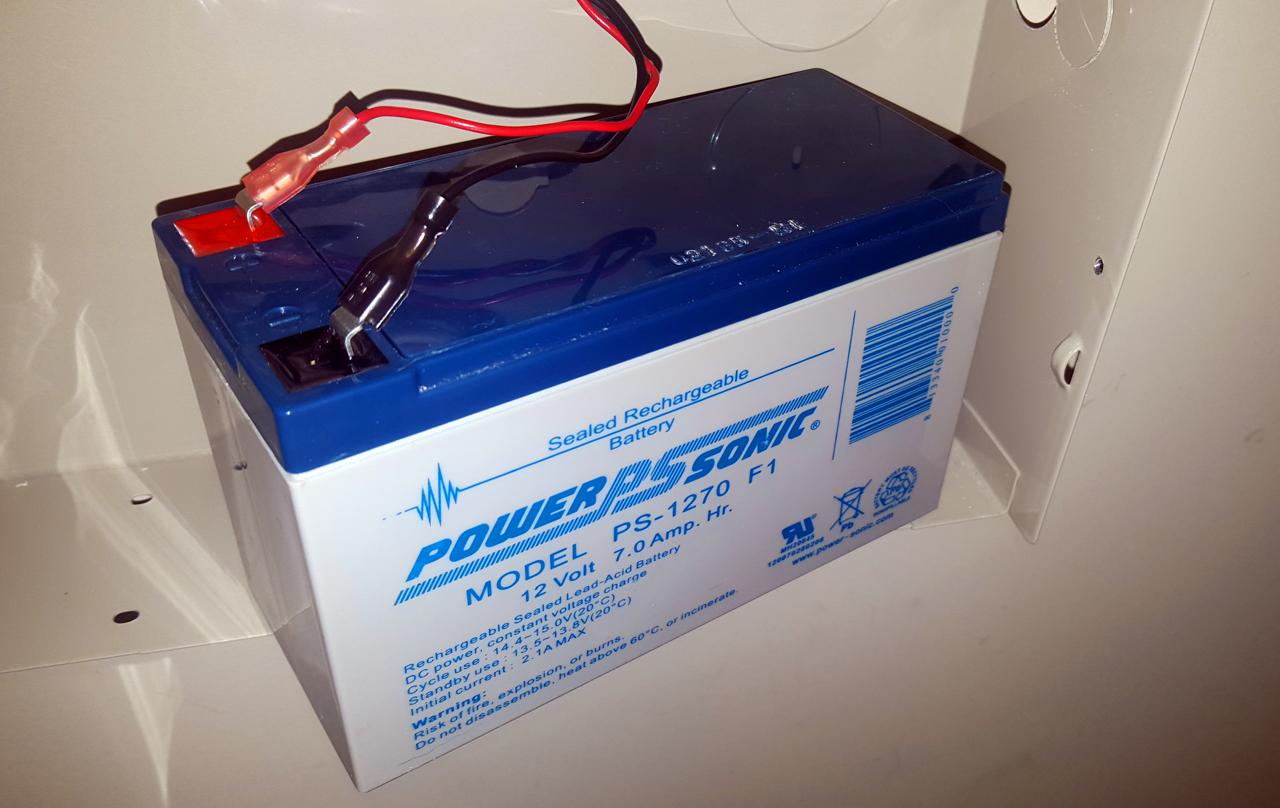
Remove any packaging and protective coverings from the new battery. Be sure the metal battery terminals are clean and clear of debris. Place the battery inside the control box so that it rests securely at the bottom of the cabinet.
Find the battery leads to your alarm system that you previously disconnected and reconnect them to the new battery. Be careful to match the RED wire to the RED battery terminal, and the BLACK wire to the BLACK battery terminal.
Warning: Reversing the wiring leads to the battery can cause permanent damage to your alarm system.


Step 3: Finish up and run a system test, if needed
That’s it!
Make note of the date of the new battery install and close your control box. For your safety, the battery must remain inside the metal enclosure and the door must remain closed.
There are no special steps you need to take for the new battery to begin delivering backup power to your system. However, your alarm may continue to indicate battery trouble for up to 24 hours after you replace it. To force a manual battery test now (not recommended), consult your user guide or call our office.
At this time, you may wish to perform a system test to ensure everything works properly. Consult your user guide or call our office for information about system tests.
Learn how and where to dispose of your old batteries.


